Every so often you come across an animation on a website or in an app that catches your eye. Animation does more than add some fun. It helps people understand what is happening, makes the result of an interaction clear, and carries the personality of a brand.
Things are different when you’re the one who has to build it. You’ve probably watched a prototype video from a designer and wondered how on earth you were supposed to implement it. Or maybe you’ve had a motion pictured clearly in your head but no idea where to start turning it into code.
But animation can be designed. Motion that looks complicated is, once you break it down, a combination of simple state changes, and each of those state changes can be expressed mathematically. This article goes through how to decompose and design animation in a systematic way.
Animation Is a Graph
To design something, two conditions have to hold. You have to be able to reproduce it, and you have to be able to combine it. If a motion only exists as a feeling in your head, it is hard to recreate the same movement twice, and hard to weave several movements together in any organized way. So we need an engineering representation of motion, and a graph works well for this. Every animation can be expressed as a graph, and once you adopt that view, even complicated movement becomes something you can analyze and build systematically.
Think of a fade-in animation, where an element’s opacity goes from 0 to 1. Drawn as a graph, the horizontal axis is time and the vertical axis is opacity. For example, you could draw a graph that starts at 0 seconds, ends at 2 seconds, and climbs from 0 to 1 in between.
The same goes for movement. An element sliding from left to right can be drawn as a time-position graph, and an animation where something grows becomes a time-scale graph. The horizontal axis doesn’t have to be time, either. In a parallax effect, where elements appear as the page scrolls, the scroll offset becomes the horizontal axis. Whatever the animation, in the end it is a value changing according to some input, and that change can be drawn as a graph.
The shape of the graph determines the feel of the motion. Even with the same start and end points, the form of the curve can give a completely different impression. Producing that curve the way you want it is the core of animation design, and the tool for doing so is math.
Math, the Toolkit for Animation
So how do you make a graph with the shape you want? You use math. This section looks at the mathematical tools that come up often in animation and how they control the shape of the graph. Math may feel unfamiliar, but there’s no need to worry. You don’t need to understand the concepts in depth. You just need a sense of how each tool changes the feel of the animation.
Easing and Bézier Curves
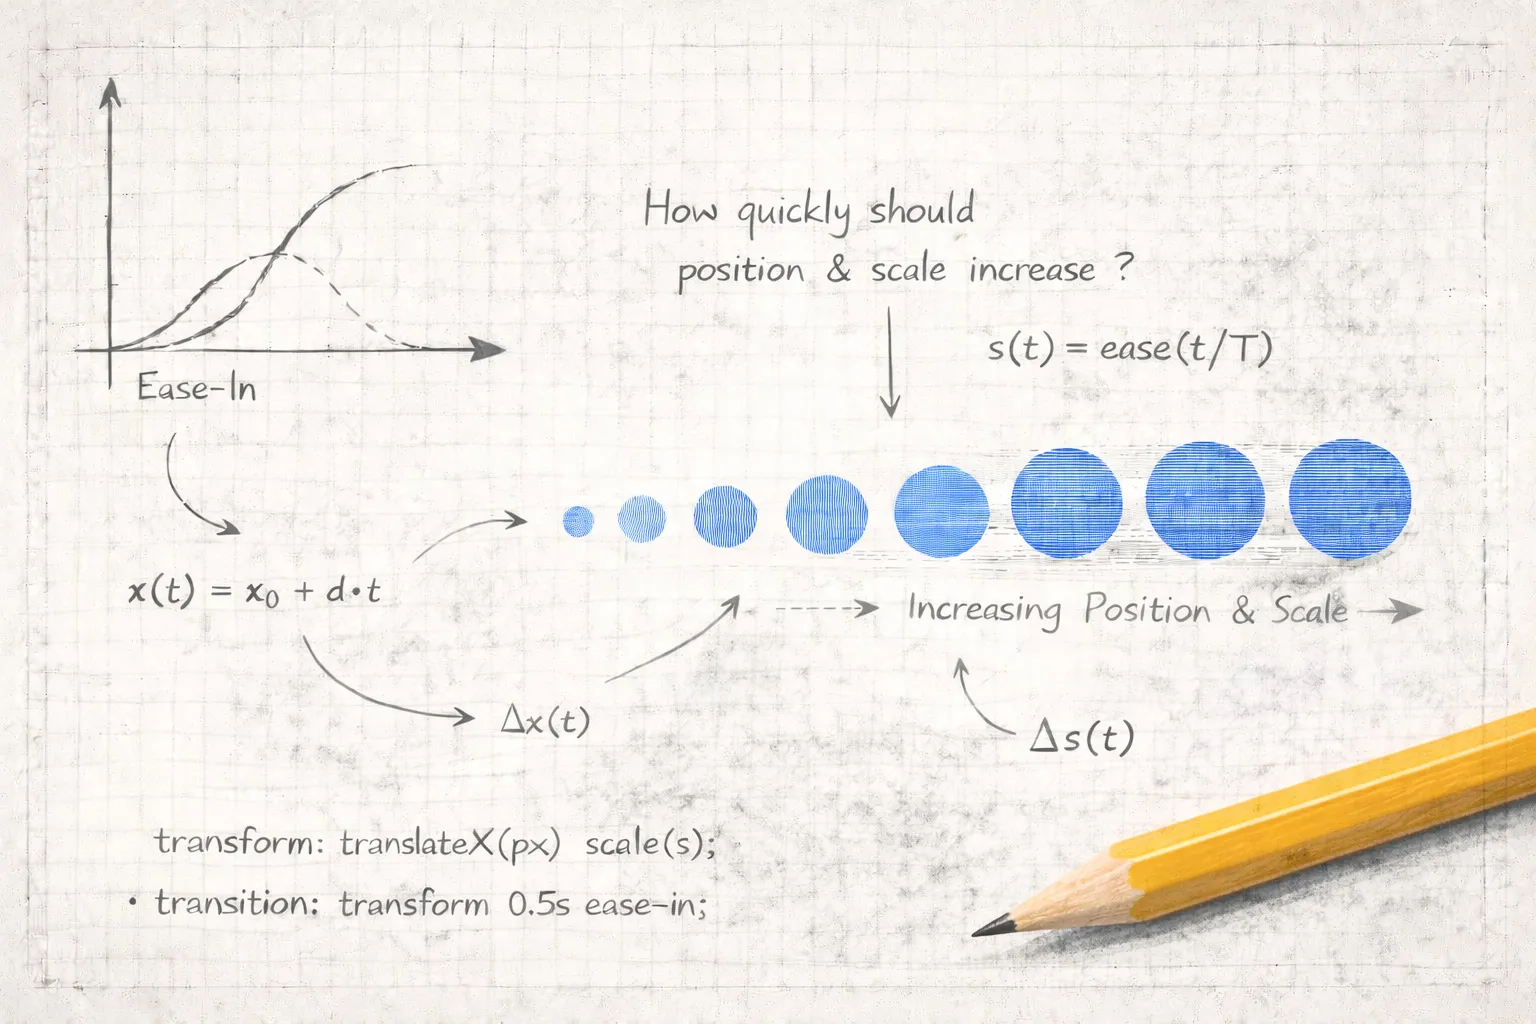
The simplest animation is linear, where the value changes at a constant speed from start to finish. But motion in the real world isn’t linear. A thrown ball is fast at first and gradually slows down, and a car starts off slowly and picks up speed. Easing functions are how this kind of natural acceleration and deceleration gets expressed.
An easing function takes a progress value between 0 and 1 and returns an adjusted progress value. ease-in starts slow and ends fast, while ease-out starts fast and ends slow. The most widely used way to express this mathematically is the cubic Bézier curve.
A cubic Bézier curve defines its shape with four control points. For easing, the start point (0, 0) and end point (1, 1) are fixed, so in practice you only adjust the two control points (x1, y1) and (x2, y2). The curve doesn’t pass through the control points. Instead, each control point pulls the curve toward itself, bending its path a bit like a magnet would.
So how does a curve get built from control points? Through linear interpolation, applied recursively. Linear interpolation between two points is simple. When the progress t is 0 you get the start point, when it’s 1 you get the end point, and when it’s 0.5 you get the exact midpoint.
function lerp(a, b, t) {
  return a + (b - a) * t;
}
A Bézier curve repeats this interpolation over several stages. Suppose we have four control points, P0, P1, P2, and P3.
- Interpolate between P0–P1, P1–P2, and P2–P3 at
t, giving three intermediate points - Interpolate between those three at
t, giving two points - Interpolate between those two at
t, and you have a point on the curve
This approach is quite powerful, because two control points are enough to produce a wide variety of motion. Below are some of the control point combinations you’ll run into most often.
So how do you choose an easing in practice? Let’s use a toast notification sliding up from the bottom of the screen as an example.
With ease-out, the toast appears quickly, grabs the user’s attention, then decelerates smoothly into its final position. With ease-in, it starts slowly and gets faster, so the entrance is more relaxed and less noticeable. linear rises at a constant speed and then stops abruptly, which gives it a mechanical feel.
It’s the same element and the same movement, but the impression changes completely with the easing. No single easing is the “right” one. It depends on what purpose the motion serves. If you need to draw the user’s eye quickly, a curve that’s fast at the start works well, and if something should disappear quietly, a curve that’s fast at the end does. In the demo below, try applying different easings to the same toast and compare how the impression changes.
Once you understand how Bézier curves work, you can design the motion you want directly, without leaning on a tool. If you need something that “pops out quickly and then settles gently,” give the first control point a large y value and put the second one near (1, 1). You draw the shape of the graph first, then find the control points that match it.
Exponential Approach
Easing is a curve with a fixed start and end. But what about situations where the target value can change partway through? If the target changes every frame, as it does for an element that follows the cursor, a predefined curve has a hard time keeping up. A useful pattern here is the exponential approach.
value += (target - value) * factor; // factor: 0~1The formula is surprisingly simple. Apply it every frame and the value moves only by an amount proportional to the difference between the current value and the target. The result is a natural deceleration curve that approaches quickly at first and then slows down.
With a small factor the value approaches slowly, and with a large one it approaches quickly. Mathematically, this is exponential decay. The difference shrinks by a ratio of (1 - factor) every frame, so the remaining distance decreases exponentially.
This applies equally to any kind of value, not just position. A dashboard counter that climbs quickly toward its target number and then slows down as it settles works on the same principle.
A progress bar is another example. The actual progress value jumps forward in chunks depending on network conditions, but if the displayed bar chases that value with an exponential approach, the user sees it as smooth, continuous progress.
The exponential approach also stays natural when the target changes. If the cursor suddenly moves to the other side of the screen, the element changes direction smoothly from wherever it currently is and heads toward the new target.
Spring Animation
Easing and the exponential approach both converge on the target monotonically. Real objects have inertia, though. They overshoot the target slightly and come back, and that elasticity adds a sense of life to the motion. If you want the springy feedback of a pressed button, or the feel of a dragged element bouncing back to where it belongs, a spring animation is the tool to use.
Spring animation is based on damped harmonic oscillation from physics. Think of a weight hanging from a spring. Pull it down and let go, and it oscillates around its resting position, with friction shrinking the amplitude until it eventually stops.
Two forces are at work.
- Restoring force: pulls toward the target, harder the farther away.
F = -k × (current - target), wherekis the stiffness. - Damping force: resists motion in proportion to velocity.
F = -c × velocity, wherecis the damping coefficient.
Every frame, you add the two forces together to get the acceleration, use the acceleration to update the velocity, and use the velocity to update the position. In code it looks like this.
const force = -stiffness * (current - target) - damping * velocity;
velocity += force * dt;
current += velocity * dt;The feel of a spring is determined by the two values stiffness and damping. Higher stiffness makes it taut and quick to respond, and lower damping makes it oscillate for longer. Adjusting just these two parameters gets you anything from a button that snaps back with a flick to a card that settles gently into place.
You can see this in a like button. The moment you press the heart, its scale shrinks for an instant and then springs back toward its original size. Because the spring overshoots, passing the target slightly before returning, the press gets a tactile sense of feedback.
The fundamental difference between spring animation and easing-based animation is that a spring has no duration. Easing has a fixed time like “over 0.3 seconds,” whereas a spring is a physics simulation that keeps running until it converges. Another difference is that when the target changes midway, a spring keeps its current velocity and transitions naturally toward the new target.
Physics Simulation
A spring is a system where one value oscillates toward one target. Physics can be applied more broadly than that. Combining laws like gravity, collision, friction, and inertia produces complex motion that would be very hard to design by hand, and it comes out looking natural.
The basic structure of a physics simulation is simple. Three steps repeat every frame.
- Compute forces: sum everything acting on each object (gravity, springs, friction, user input, and so on)
- Integrate: force gives acceleration, acceleration updates velocity, velocity updates position
- Apply constraints: collision detection, boundary limits, joints and connections
for (const obj of objects) {
  // Compute forces
  const gravity = { x: 0, y: 9.8 * obj.mass };
  const friction = { x: -obj.vx * drag, y: -obj.vy * drag };
  const fx = gravity.x + friction.x;
  const fy = gravity.y + friction.y;

  // Integrate
  obj.vx += (fx / obj.mass) * dt;
  obj.vy += (fy / obj.mass) * dt;
  obj.x += obj.vx * dt;
  obj.y += obj.vy * dt;

  // Apply constraints (floor collision)
  if (obj.y > floorY) {
    obj.y = floorY;
    obj.vy *= -restitution; // bounce scaled by restitution
  }
}
This structure is powerful because you only define the rules, and the motion takes care of itself. Confetti shows this well. Designing the trajectory of every piece with easing functions would be unrealistic. But if you set up gravity, air resistance, and rotation, dozens of pieces fall along their own separate paths without you ever thinking about an individual trajectory.
In that sense, physics simulation is useful when many objects interact with each other, or when the outcome depends on user input.
On the other hand, physics simulation is less predictable. With an easing-based animation you know exactly where everything will be at any given moment, but a simulation’s result depends on its initial conditions. For that reason it is often better suited to supporting effects and interactive elements than to a UI’s core transitions.
Natural Direction Changes
So far we’ve looked at how much a value changes as it heads toward a target. This section is about which direction it changes in. Say you’re building an animation where an element follows the cursor around the screen. Following the position isn’t hard. But what if you also want the element to rotate so that it faces the direction it’s moving in?
The atan2 function handles this. atan2(dy, dx) returns the angle between two points in radians. Pass in the difference (dx, dy) between the current position and the target position, and you get the direction the element should face.
const dx = targetX - currentX;
const dy = targetY - currentY;
const angle = Math.atan2(dy, dx);
element.style.transform = `rotate(${angle}rad)`;
It’s simple, but it makes a big difference to how natural the motion feels. atan2 is at the heart of effects like an arrow that points in the direction it’s moving, a character that turns its head toward its destination, or particles that stretch out in the direction they spread.
One practical use of atan2 is the 3D tilt effect, where a card leans toward the cursor as the mouse moves over it. atan2 gives the direction of the cursor, and the distance from the center gives the strength of the tilt.
Being able to find the direction between two points like this greatly widens the range of animation you can express.
Periodic Motion with Trigonometry
The trigonometric functions we learned back in school have far more uses in animation than you might expect. Their key property is periodicity. Because their values cycle endlessly between -1 and 1, they are the ideal tool for building repeating motion.
A single sin function and some phase offsets are enough to coordinate the movement of dozens of elements. Most periodic animation that looks choreographed, such as loading indicators, equalizer bars, and ripple effects, is built on this principle.
const y = amplitude * Math.sin(time * frequency);By adjusting three parameters of sin or cos, you can shape the repetition however you like.
- Amplitude: the size of the motion. Bigger means wider swings
- Frequency: the speed. Higher means faster repetition
- Phase: the starting offset. Different phases across elements create a wave
Trigonometric functions are at their most powerful when you give several elements different phases. For example, if each item in a list gets a phase proportional to its index, the items move one after another like a wave.
items.forEach((item, i) => {
  const y = amplitude * Math.sin(time * frequency + i * phaseOffset);
  item.style.transform = `translateY(${y}px)`;
});In practice, the typing indicator in messaging apps is the classic example. The three dots bouncing in turn are the same sin function with different phases.
The floating effect you often see on landing pages can be built with trigonometry as well. Give each element a different amplitude, frequency, and phase, and a single sin function produces a natural-looking background.
Sawtooth Waves
sin suits motion that goes back and forth, rising and falling. But not every repetition is a round trip. Some patterns, like the pulse ring on a notification badge, go from 0 to 1 in one direction, jump back to the start, and begin again. This is called a sawtooth wave.
const p = (t % period) / period; // always 0~1, resets every periodTaking the remainder of t divided by period gives a value that rises linearly from 0 to 1 and then drops immediately back to 0. Map this p onto scale or opacity and you get a repeating “spread out and fade away” effect.
const scale = 1 + p * 0.8;   // grows from 1 → 1.8
const opacity = 1 - p; // fades from 1 → 0Thanks to its simple “start, end, reset immediately” structure, the sawtooth wave is widely used for patterns like pulses, pings, and looping progress indicators. With just these two, the smooth round trip of sin and the one-way reset of the sawtooth, you can express most periodic animation.
Designing an Animation
We’ve now looked at mathematical tools like easing, springs, and trigonometry. Sometimes a single tool solves the problem, but most real animations are more complicated than that. Suppose you want a notification to appear with the background dimming, a card rising up, and the content revealing itself. How would you go about it?
To design a complex animation, there are two things to understand first: how to split a graph into pieces, and what the animation’s state depends on.
Split the Graph
Complex motion is hard to express with a single formula. In these cases, you can split the graph into segments.
For example, think of the pin in a map app bouncing in place a couple of times before it settles. A physics simulation could produce something similar, but natural motion doesn’t always make for good animation. You might want to deliberately lower the height of the second bounce, or make the final landing softer. Splitting the graph into segments makes that kind of fine adjustment possible. Each segment is a simple piece of graph, and joining them together completes the whole animation.
This kind of graph works on the same principle as what mathematics calls a piecewise function. You divide complex motion into simple pieces, design each piece individually, and then join them back together.
What Does the Value Depend On?
The horizontal axis of a graph doesn’t have to be time. Let’s look at that more concretely, because figuring out what the animation’s value depends on is the starting point of design. There are three main types.
Time-based animation is the most common form. The value changes as time passes from some starting point. It takes the previous state, applies the change in time, and produces the next state, which can be written as f(state, Δt) → nextState. Applying this function repeatedly every frame moves the animation forward.
Value-based animation takes a particular value other than time as its input. The typical example is a scroll-driven parallax effect. An element’s position or opacity changes according to how far the user has scrolled, so the scroll offset serves as the horizontal axis of the graph. All sorts of values, such as mouse position or sensor data, can play that role.
Event-based animation switches its value in response to a particular trigger. When an event occurs, such as a hover, a click, or data finishing loading, a transition animation from the current value to the next one begins. This is often a hybrid form, where the event triggers the animation and the transition itself runs on time.
The first question to ask when designing any animation is “what does this animation’s value depend on?” Answering it fixes the horizontal axis of the graph, and from there you can choose an implementation approach that fits.
Once you know how to split a graph and what the value depends on, the next step is to assemble the pieces. There are three patterns, depending on how you assemble them.
Pipelining
The most intuitive way to assemble pieces is to line them up in order. This is called pipelining. If you were designing the notification animation from earlier, for example, it would break down into three pieces.
- Background dims: opacity 0 → 0.5, 200ms
- Card slides up: from below to its position, 300ms, ease-out
- Content fades in: opacity 0 → 1, 200ms
Each piece is its own graph, but placed in order on the time axis they form a pipeline.
There are various placement strategies, and a piece doesn’t necessarily have to wait for the previous one to finish.
- Sequential: B starts when A ends
- Overlapping: B starts at A’s 80% mark, which reduces the sense of a gap between pieces
- Simultaneous: A and B start together but animate different properties
- Staggered: the same animation across multiple elements, offset in time. List items appearing one by one is the classic case
Pipelining makes it possible to modify each piece independently. If the card rises too quickly, you fix just that piece. There’s no need to redesign the whole animation from scratch.
Designing with State Transitions
Where pipelining lays pieces out in order along some axis, a state transition moves to the next stage when a condition is met. It suits cases where a single element passes through several stages whose character changes completely along the way.
Let’s design a firework. A single particle passes through these states.
| State | What changes | Graph | Transition condition |
|---|---|---|---|
| Launch | height ↑ | acceleration (ease-in) | velocity = 0 → explode |
| Explode | particles split | instant switch | immediately → spread |
| Spread | radius ↑, speed ↓ | deceleration + gravity | time elapsed → fade |
| Fade | opacity ↓ | linear decrease | opacity = 0 → remove |
Each state has a different graph. Launch is time-height, spread is time-radius, and fade is time-opacity. Expressing all of it with one formula would be difficult, but if you cut at the state boundaries, each piece is simple.
Define the transition conditions clearly. If you spell out the trigger for moving to the next state, like “explode when velocity reaches 0” or “remove when opacity reaches 0,” even a complex animation can be managed like a state machine. That also means it can be expressed as a diagram, like this one.
Compared with pipelining, the emphasis shifts from when to under what condition. Because transitions are decided by state values instead of time, this approach fits naturally in situations where the outcome is hard to predict ahead of time, such as physics simulations or user interaction.
Property Splitting
Sometimes several properties need to change at the same time. In that case, it’s a good idea to separate the properties into independent tracks.
Say you have a pricing plan card that the user clicks to select. When the card is clicked, the border needs to turn blue to show that it’s selected. The card also needs to grow slightly for emphasis. And the details the user is interested in need to be revealed. Three changes happen at the same moment, but each one calls for motion of a different character.
Tying these together in a single formula can’t satisfy each requirement. Instead, you separate each property into its own independent track. Take a look at the example below.
Team collaboration
Priority support
With property splitting, the tracks don’t need to know about each other. Modifying the border track has no effect on the size or the details. This independence makes it easy to fine-tune a single property or add a new one.
Randomness
Earlier, in the section on state transitions, we looked at a firework example. What if every particle spread out at exactly the same speed and at perfectly even angles? It would be geometrically accurate, but it wouldn’t look natural. Real fireworks are a little irregular, and that irregularity is what makes them feel natural.
Adding randomness to an animation is how you get away from a mechanical feel. You might give particle speeds a ±20% variance, add a slight wobble to the angles, or shift the start times so they’re slightly out of step.
There is an important principle here, though. Random shouldn’t mean truly random. Complete randomness is unpredictable and produces results you didn’t intend. The particles might all end up leaning to one side, for example, or the sizes might come out at extremes.
Size 1 ~ 9
Color 0° ~ 360°
Distribution Random
Size 2.5 ~ 4
Color Base hue ± 20°
Distribution Even spacing + slight jitter
It helps to think of an animation as divided into what’s intended and what’s unintended. The particles rising upward is intended motion, and the small differences in speed between them are unintended elements that were put there on purpose. The designer has to decide how much to control and how much to leave to chance. Set that boundary well and you get an animation where order and naturalness coexist.
Bidirectionality
Most of the animations we’ve looked at so far flow in one direction, from start to end, from 0 to 1. But in some cases, such as scroll-driven animation or drag interactions, the user can change the direction of travel. Scroll down and an element appears; scroll back up and it disappears. Animations like these have to be designed with reverse playback in mind.
The example below shows how a scroll-driven parallax effect can be designed to work in both directions. The element appears and disappears as you scroll, and the motion carries on naturally when the scroll direction changes.
For value-based animations like parallax, handling both directions is relatively easy. The horizontal axis of the graph is the scroll offset, so when the direction changes you just follow the same graph in reverse. Event-based animations, like something that appears and disappears on a button click, need more attention. If you don’t account for bidirectionality, problems like these come up.
- Jumps: if you press “hide” while the element is still appearing, the exit animation starts from the beginning and ignores the element’s current position. The element teleports and the motion is cut off
- Same graph in both directions: using the same easing graph for appearing and disappearing makes the motion feel awkward. If an element appeared with ease-in, for example, it should disappear with ease-out to look natural
When bidirectionality is handled properly, the animation reverses from its current state the moment the direction changes. Try toggling quickly while the element is still appearing in the example below, and you can feel the difference.
What About Really Complex Animations?
The techniques covered so far can handle a good deal of animation, but they do have limits. Building something like a character walking and running, a hand-drawn style morph, or an intro where dozens of layers interlock precisely in code alone just isn’t realistic.
In cases like these, using a dedicated tool is the right call. You might build the animation in After Effects and export it with Lottie, or use a tool like Rive that specializes in interactive animation. Or you could produce a video and simply play it back. Choosing the appropriate tool gives better results than trying to solve everything in code.
Looked at the other way, the strength of animation written in code lies in real-time interaction. Motion that responds immediately to user input and changes dynamically with state is hard to achieve with a pre-made video. That is where the techniques in this article shine.
Closing
If you’ve ever felt stuck trying to implement an animation, I hope this article helped you find a place to start. In the end, the core of animation design is decomposition. Any motion becomes simple once you break it apart, and simple pieces can be drawn as graphs. Practice that process consciously, and the distance between the motion in your head and the code that produces it will keep getting shorter.